
How I Organize My Watercolor Artwork

After you start watercoloring, you’re going to quickly accumulate a lot of paintings. Stacks of watercolor paper will start to pile up and take up more and more space.
And because it’s watercolor you’ll find the paper doesn’t lie flat or sit nicely, so the stacks are not neat and tidy, but more unruly and have a tendency to topple over.
It will start to bother you every time you look at it and make you feel like things are a mess and suddenly your WHOLE ENTIRE LIFE needs to get the KonMari treatment…ok maybe that’s just me.
But the need to find a way to organize our watercolor artwork is a real thing. Because you can’t just have all this paper lying around or stuffed in between your books on your bookshelves.
Alright, maybe you can live with the paper mess. But in my humble opinion, that’s no way to treat your paintings or manage your space. I like things to have their place and for my space to feel neat and clean.
So if you want to know how I keep my stacks of paintings under control, read on for my super simple system of keeping (most) of my artwork nicely organized!
STEP ONE: SORT THE STACKS
If you’ve already accumulated some paintings there’s one very important step I always do when I sit down to organize and that’s going through my stacks.
I always seem to let paintings that are half-done or were done for practice pile up. Some of these I want to keep and others need to be tossed.
I sort my stacks into the following sections first:
Recycle
Save for Scrap: To be saved so I can use the backside for practice/swatching/practice
File: Artwork that I want to keep for myself, to scan for digital work, or to sell as an original
I’ll go into a little more detail on the thought behind each section below. It may help if you get stuck on how to decide which section to sort your work into:
RECYCLE
This is work that is going into the recycle bin. I try to be pretty cut-throat about this because I’m more of a minimalist when it comes to the accumulation of stuff. For context I can’t call myself a true minimalist (as much as I admire the lifestyle) but I’ve been described once by a friend who helped me move as “the opposite of a hoarder” (exact words).
Paper has been used on both sides
Paper is smaller than roughly 4”x6”
Paper that is heavily warped from painting and not worth my time to flatten
SAVE FOR SCRATCH
These are paintings that I don’t want to save but still have a blank side or blank areas on the front that I know I can use for practice or swatching at my next painting session. I like to do quick practice paintings if I’m painting something that I’m not confident about painting onto a nice new blank sheet of paper.
Just a note that watercolor paper has a “front” and “back” and the way water and paint react with the paper may be different depending on what side you’re painting on. This also varies between brands - in fact I’ve read that some artists actually prefer the backsides of papers! But since I’m using it as scratch paper I don’t really worry about this aspect.
FILE
These are the paintings I want to save - usually for one of the following reasons:
For my own personal record (I really need to get better about dating them on the back)
For digital projects (I’ll scan and digitize them later, or maybe already have and want to save the original.)
Ok so after I’ve sorted them out, I put the “to recycle” in the bin, shelf the scrap paper with my watercolor paper pads, and set aside the “to file” so I can actually file them.
Get ready for it...my artwork organization system is SUPER simple.
(Just wanted to set your expectations here...)
STEP TWO: FILE THE ARTWORK
I found a file box for my artwork and that’s how I currently organize my paintings.
What I use:
Hanging file folders* (like these)
*A note on the hanging folders:
Mine are standard hanging file folders and not archival quality. Since I’m storing artwork that I’m keeping for myself (not finished paintings for sale) I didn’t feel the need to spend extra money getting archival quality hanging folders.
I’ve also been thinking of creating my own dividers by repurposing the rigid chipboard backing from used up watercolor paper pads. Perhaps I will one of these days!

FILE BOX
I like this particular file box because of its size and look. I specifically chose this file box from Target because:
I like the way it looks
It can hold larger sheets of paper than standard file boxes (more on that below)
The box dimensions are 13.5” wide x 12” tall x 9” deep.
However, there are two bars inside the box that hold hanging folders which take down the inside width to 12”.
If you’re using pads of paper that are 9”x12” they fit nicely inside the box. The problem I run into is when I am painting on sheets like 10”x14” or a custom size that I’ve cut myself that is larger than a 9”x12”.
I have managed to store a few sheets that are larger, and this is where I think this file box has a benefit others may not.
The lid on this file box gives it some extra interior height so that I can fit some paintings that are little too tall and stick up out of the box. I put the lid on and either it will fit inside the tall lid space, or the paper will need to “bend” or rather curl down a little to fit. I don’t mind this if they are pieces that I’m just keeping around for my own records. The bend doesn’t crease the paper so I know I can flatten it in the future if I wanted.
Hopefully that all made sense - I didn’t realize I had so much to say about the box dimensions!
FILE CATEGORIES
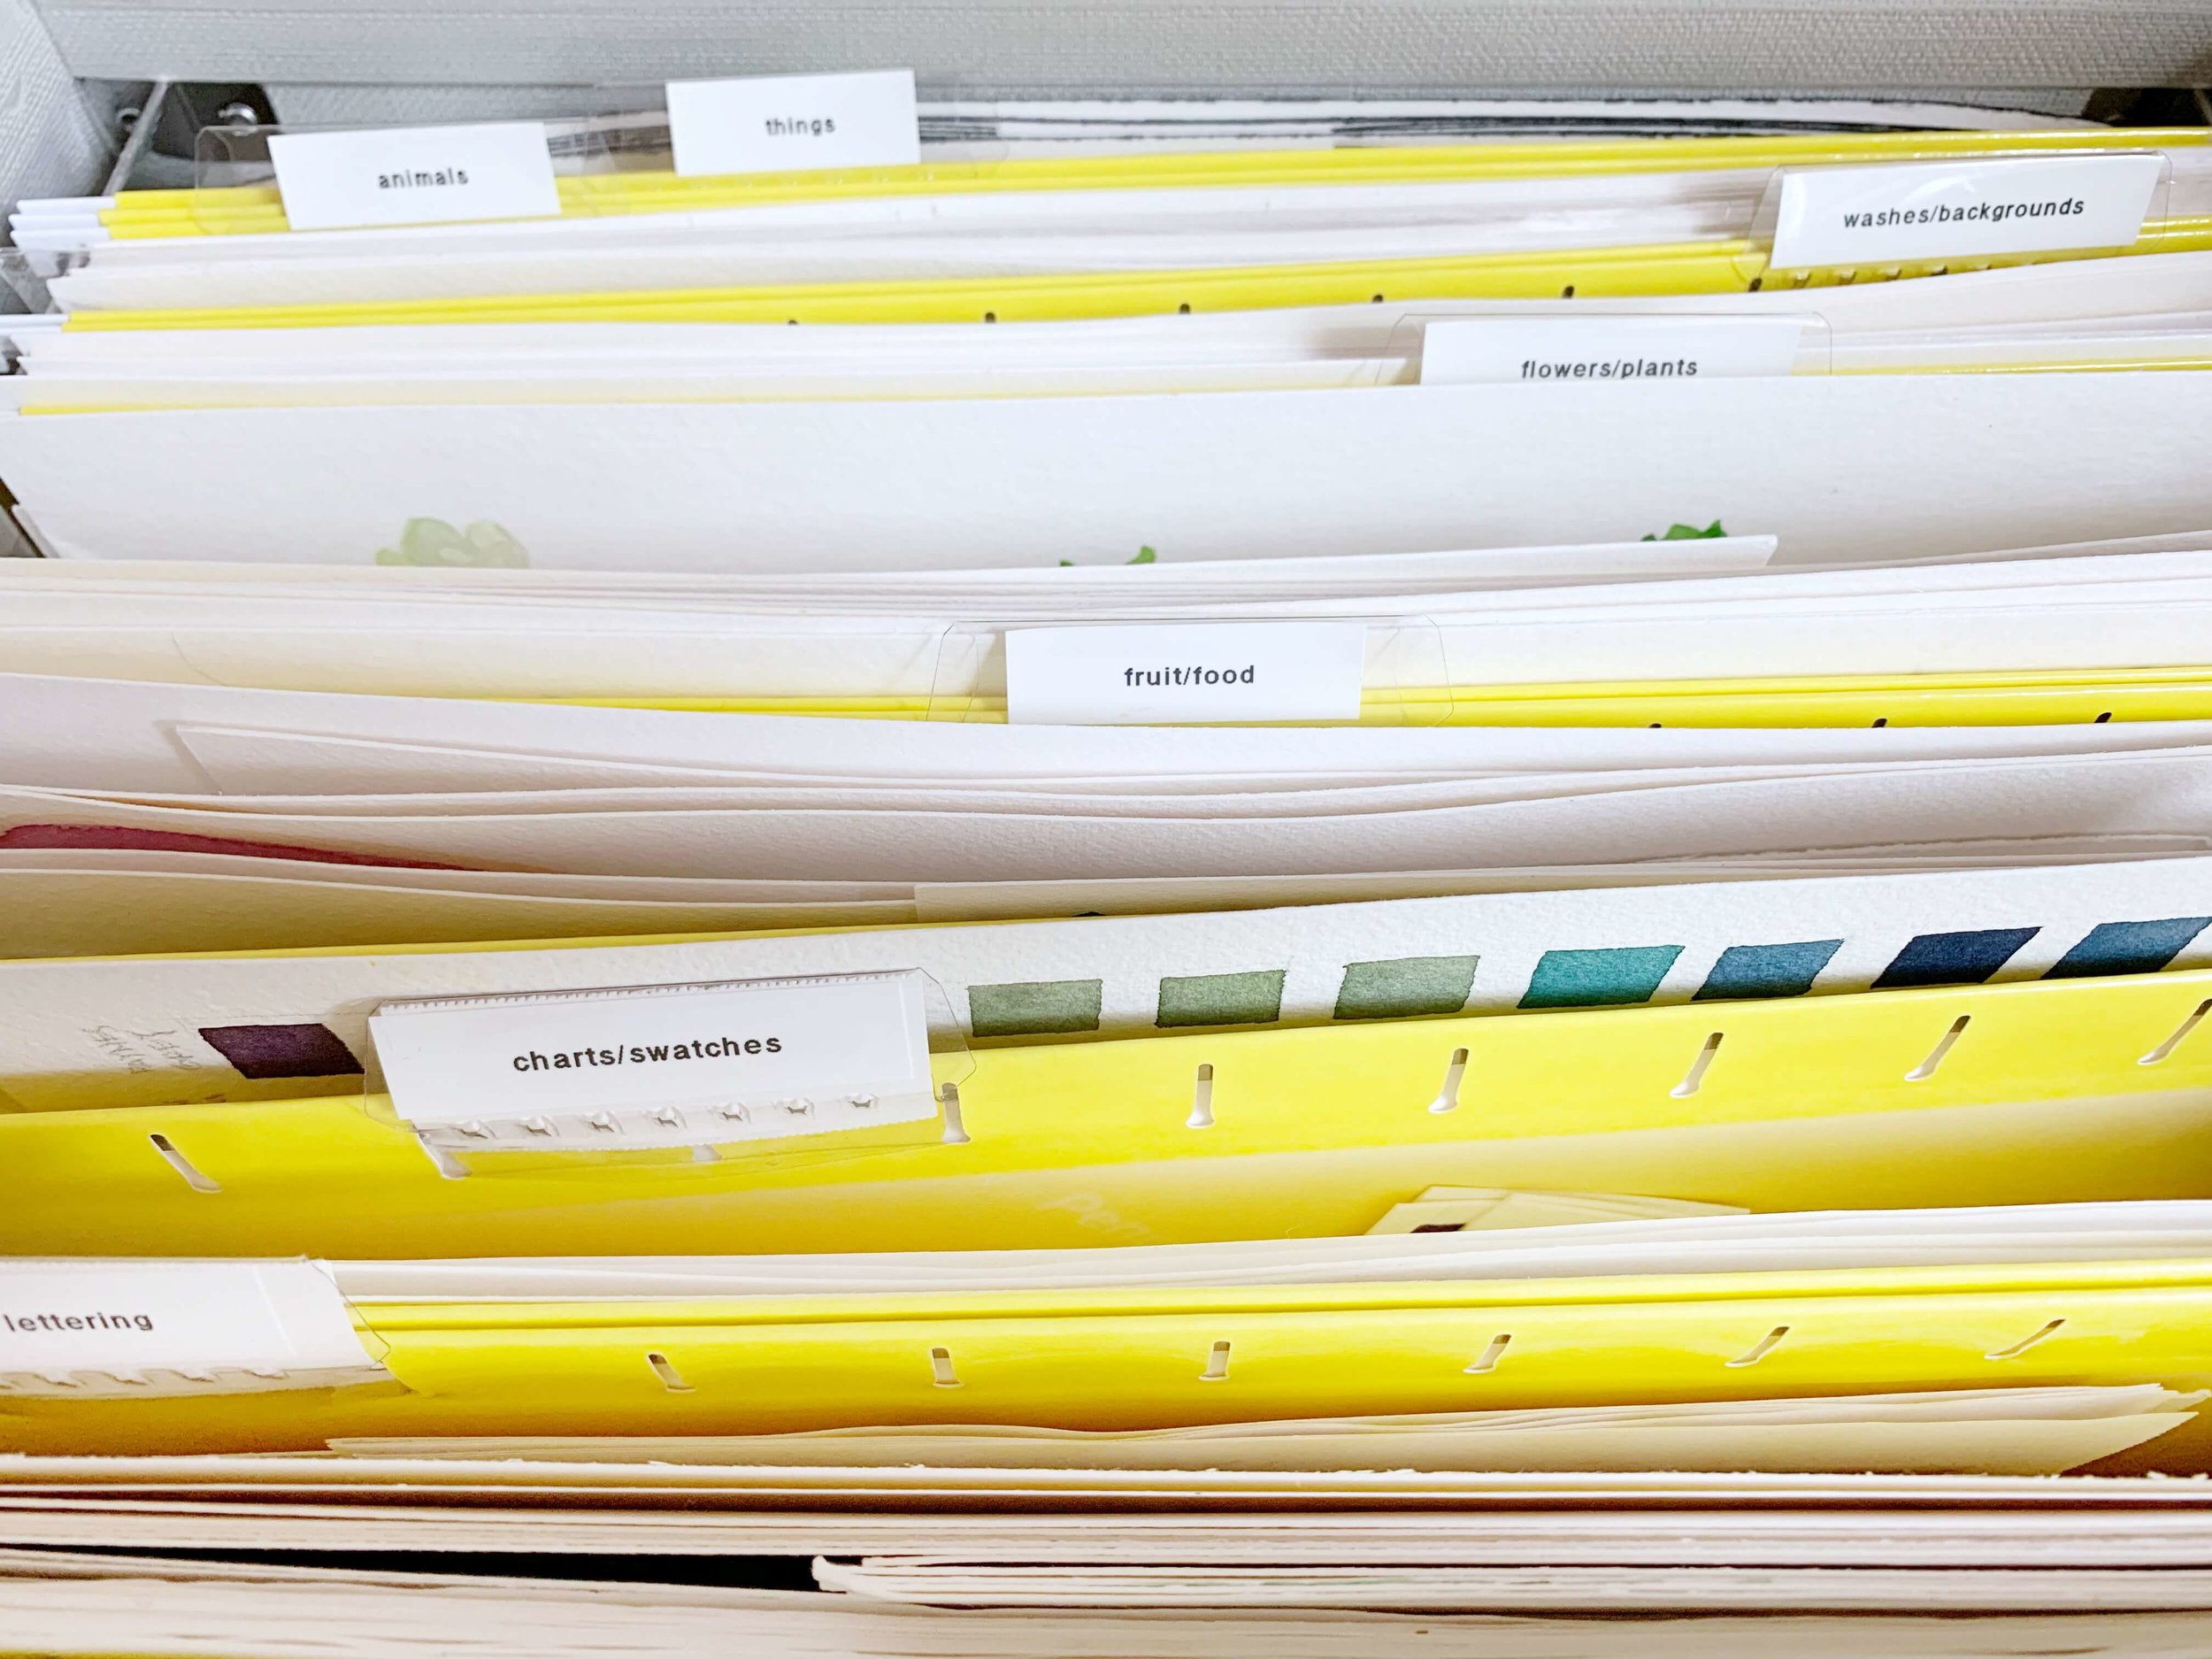
The last thing I do when I’m organizing my art is to make sure to file it into categories. I place the hanging file folders in the box and add labels to the folders.
I’ve been adding categories as needed and this is what I have created so far:
Animals: All kinds of animals
Charts/Swatches: color wheels, color charts, swatch testing on paper (I store swatch cards in a binder - link to swatch card kit)
Flowers/Plants: Botanical things
Fruit/Food: Basically anything edible
People: Faces, figure studies, etc.
Things: Catch-all for miscellaneous objects
Washes/Backgrounds: Abstract strokes, washes and color play
Lettering (work I have from my calligraphy days)
Categories I plan to add in the future (I think I might need a new box!)
Landscapes
Project Specific Folders

So that’s my system for organizing my artwork! It’s simple, doesn’t take up too much space and follows Marie Kondo’s philosophy of storing things standing up so that you can see them. (Which, by the way, I think is really smart and I try to do that with most things now. And if you don’t know who I’m talking about and are intrigued, check out her book.)
As I paint more and on larger paper, I’ve decided that I want to store more special pieces or originals that I may sell in a portfolio book. I’ve been researching a bit and may grab one of these Art Profolios.
I was originally asked by Hannah on instagram if I could share how I store my unframed artwork, so hopefully this post is helpful for her and anyone else looking for a way to organize paintings!
I’d love to know how you organize your paintings, leave me a comment below or find me on instagram and send me a message!
And if you enjoyed this content and want to be updated with the latest, make sure to sign up for my email list by filling out the form below.
As always, thank you for reading!
Susan